Streamlined Roof

I want to thank Brian K. for forwarding me a link that has been recently posted on a Cuda forum. During our conversation, the Roof profile of the vehicle was brought up regarding its design. Someone posting on that forum had commented how the Roof had been “raised” on this vehicle. That observation/comment is completely false.

Anyone familiar with automotive design knows that a 4 Door vehicle cannot have a 2 Door Fastback Roofline. The Rear Doors require enough head room for a Passenger to enter the vehicle comfortably. We lowered the Roof just over an inch to start with. The Belt-line was also lowered about the same distance. This had to be done in order for the Fenders and Quarter Panels to line up correctly with the tops of the Doors. Erroneous and false comments were made (about the Roof) during the construction of the vehicle and information was ignored about the Door Belt Moldings being lowered.

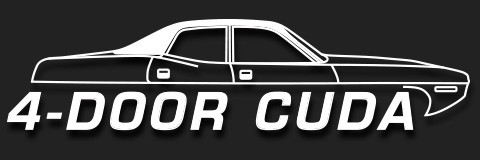
Below are side views of the vehicle with the Belt Molding Trim in place. Those pieces, along with the Stainless Drip Rail Molding, helped in framing the Window openings and eliminated the “larger” appearance. The addition of Wheel Opening Moldings also helps to streamline the side profile of the vehicle. The vehicle now exhibits the exact look we had planned for. It’s even more streamlined and “Sporty” than the regular production 4 Door vehicles that were actually built by Chrysler in the late Sixties & early Seventies. 
IMG_8537

DSC00125

The NOS Wheel Lip Moldings were quite a challenge in getting the proper fit. We had to use metal stretching and shrinking tools to obtain a perfect contour around the radius of the Wheel Well openings. The markings that were imprinted from the stretching & shrinking were removed and the proper surface finish was then restored. Here are a couple of photos showing how they fit, along with a photo of the NOS attaching Screws.

IMG_9106

IMG_9111

IMG_9103

Here are a few pictures showing the Magnum 500 Wheels and Goodyear Tires mounted on the vehicle. I used a new Camera and the pictures are not as clear as they should be. (I apologize for the lack of focus & clarity.) The Trim Rings still need to be installed but these photos illustrate the overall appearance of how the setup will look when in place. After seeing the side profile with the Tires mounted, we are considering adding Wheel Lip Opening Molding for a nice accent and finishing touch. Also notice the red small “C” that is stamped on the sidewall of the NOS Tire.

DSC00124

DSC00125

DSC00117

DSC00135

DSC00139

Here are a couple of pictures showing the “Before & After” comparisons of the same NOS Tire. After applying a coat of Wheel Armor and polishing with a brush & soft cloth, here are the results.

100_5504

100_5509

Here are a few pictures showing comparisons of the NOS Goodyear Tires that will be used on this Project. In order to make the rubber look new again, I treated them with one of our newest products; WHEEL ARMOR. This compound is dry to the touch and provides a new looking surface to the rubber. Not only does it bring back the appearance of freshly formed rubber, it protects against moisture and ultra-violet rays that are harmful to the surface. It also keeps the rubber soft and aids in eliminating dry rot and/or white chalking that can occur over time.

Wheel Armor is manufactured to treat Aluminum, Magnesium, Chrome and Painted Wheels. It provides a moisture barrier that keeps metal surfaces looking new, while protecting against unsightly oxidation. It works great on rubber components as well.

IMG_8622

IMG_8632

IMG_8626

IMG_8634

IMG_8635

IMG_8641